Introduction
Apple crisp is a timeless dessert celebrated for its warm, comforting flavors and delightful textures. Its perfect balance of tender, sweet, and tart apples topped with a buttery, crunchy oat streusel makes it a perennial favorite in homes and restaurants alike. Whether you’re a seasoned baker or a home cook eager to perfect your apple crisp, this comprehensive tutorial will walk you through every aspect of creating a delectable, authentic apple crisp from scratch.
In this guide, you will learn how to select the best apples, prepare a flavorful filling, craft a crispy, buttery topping, master baking techniques, explore creative variations, and present your masterpiece beautifully. Along the way, you’ll find tips, troubleshooting advice, and serving ideas to elevate your baking experience.
Chapter 1: Selecting the Perfect Apples
1.1 Understanding Apple Varieties for Baking
The foundation of a great apple crisp lies in choosing the right apples. Different varieties provide unique flavors and textures that influence the final outcome.
- Tart Apples: These add brightness and balance sweetness.
- Examples: Granny Smith, Bramley, Crispin, McIntosh, Jonagold
- Sweet Apples: These lend a mellow sweetness and softer texture.
- Examples: Fuji, Gala, Honeycrisp, Golden Delicious, Braeburn
1.2 Recommended Apple Combinations
For the best flavor, many bakers prefer a mixture of tart and sweet apples. Combining varieties creates depth and complexity.
- Classic mix: Granny Smith + Fuji or Honeycrisp
- Alternative options: Bramley + Gala, McIntosh + Jonagold
1.3 Selecting Fresh Apples
- Look for firm, unblemished, unbruised fruit.
- Avoid apples with soft spots, wrinkles, or discoloration.
- Choose apples that are ripe but still firm for baking—they hold their shape better.
1.4 Preparing Apples for the Recipe
- Washing: Rinse apples under cold water.
- Peeling: Optional—peeling is traditional, but leaving skin on adds texture and nutrients.
- Coring and Slicing: Remove stems, cores, and seeds. Slice apples uniformly for even baking.
- Prepping for Filling: Toss sliced apples with lemon juice to prevent browning and add a slight tang.
Chapter 2: Preparing the Apple Filling
2.1 Ingredients for the Filling
- 6 to 8 cups sliced apples (about 4-6 large apples)
- 1/2 cup granulated sugar (adjust based on sweetness and tartness of apples)
- 2 tablespoons light brown sugar or maple syrup (optional, for richer flavor)
- 1 teaspoon ground cinnamon
- 1/4 teaspoon ground nutmeg
- 1 tablespoon lemon juice
- 1 teaspoon vanilla extract
- 2 tablespoons all-purpose flour or cornstarch (for thickening)
- Pinch of salt
2.2 Making the Filling
Step 1: Toss the sliced apples with lemon juice. This prevents browning and enhances flavor.
Step 2: In a large mixing bowl, combine sugars, spices, vanilla, salt, and flour.
Step 3: Add the apples to the bowl and toss gently to coat evenly. The flour or cornstarch helps thicken the juices during baking.
Step 4: Allow the mixture to rest for 10-15 minutes. This resting period helps the flavors meld and ensures even coating.
2.3 Tips for Flavor Enhancement
- Add a pinch of ground ginger or allspice for extra warmth.
- Incorporate a splash of bourbon or apple brandy for depth.
- Use dark brown sugar for a richer, caramel-like flavor.
Chapter 3: Making the Classic Oat Topping
The topping provides the signature crunch and buttery aroma. It’s a simple yet vital component.
3.1 Ingredients for the Topping
- 1 cup old-fashioned rolled oats
- 1 cup all-purpose flour
- 1/2 cup packed light brown sugar
- 1/2 teaspoon ground cinnamon
- 1/4 teaspoon salt
- 1/2 cup unsalted butter (cold and cut into small pieces)
- Optional: 1/2 cup chopped nuts (walnuts, pecans) for added crunch
3.2 Preparing the Topping
Step 1: Mix dry ingredients — oats, flour, sugar, cinnamon, salt — in a bowl.
Step 2: Add the cold butter.
Step 3: Using a pastry cutter, fork, or your fingers, cut in the butter until the mixture resembles coarse crumbs or pea-sized pieces. The cold butter creates a flaky, crumbly texture.
Step 4: Fold in chopped nuts if using.
Tip: Do not overmix; large buttery crumbs are desirable for a crispy topping.
Chapter 4: Assembling and Baking the Apple Crisp
4.1 Assembling the Dessert
Step 1: Preheat your oven to 350°F (175°C).
Step 2: Butter your baking dish—an 8×8-inch square pan, 9-inch round pie dish, or similar.
Step 3: Spread the apple filling evenly in the prepared dish.
Step 4: Sprinkle the oat topping generously over the apples, covering the entire surface.
4.2 Baking Tips
- Use a dish with high sides to contain bubbling juices.
- For an extra caramelized top, sprinkle a tablespoon of brown sugar or drizzle honey over the topping before baking.
- To prevent over-browning, cover the dish loosely with foil during the first 20-25 minutes, then remove for the remaining baking time.
4.3 Baking Duration
- Bake for 40-45 minutes or until the topping is golden brown and the filling is bubbling.
- Check at 35 minutes; if the topping is browning too fast, cover with foil.
- Insert a knife or toothpick into the filling to ensure apples are tender.
4.4 Resting and Serving
- Allow the apple crisp to rest for 10-15 minutes after baking. This helps the juices thicken.
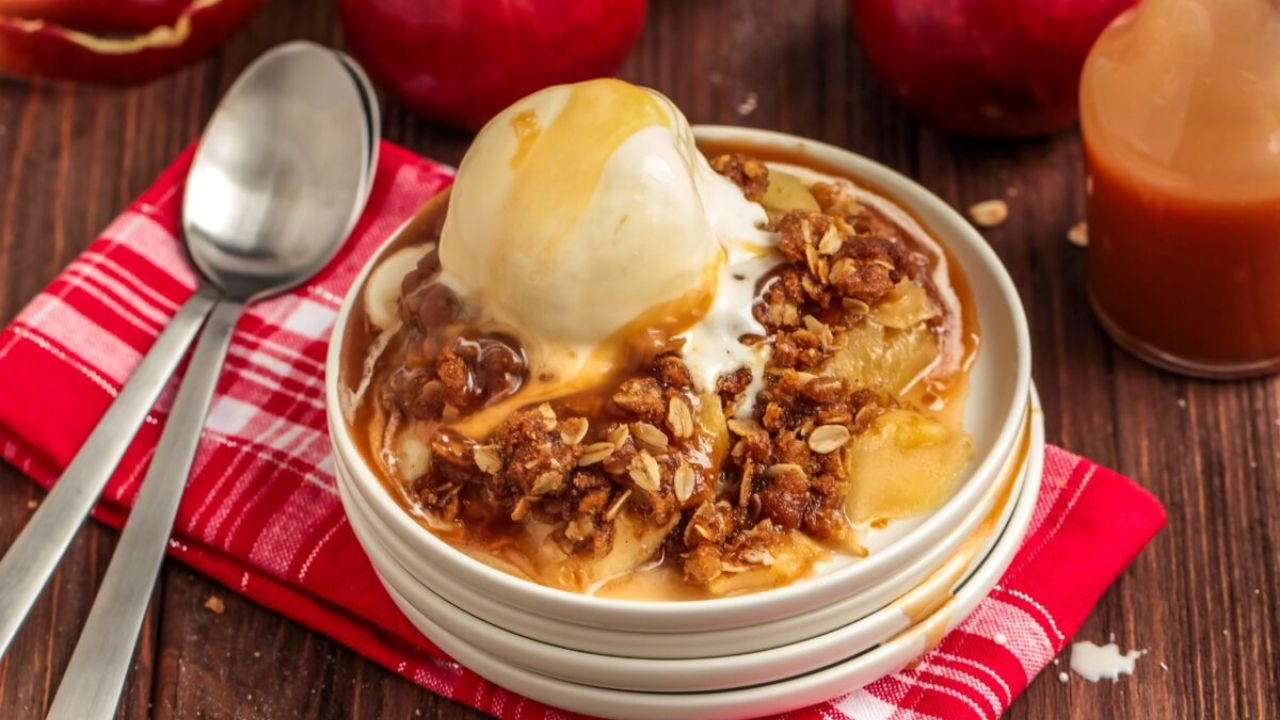
- Serve warm or at room temperature.
Chapter 5: Serving Suggestions and Accompaniments
5.1 Classic Serving Ideas
- Vanilla ice cream: Melting and creamy, complements warm apple crisp perfectly.
- Whipped cream: Light and airy, adds elegance.
- Custard or caramel sauce: For extra richness.
- Cheddar cheese: Sharp cheddar pairs surprisingly well with baked apples for a savory touch.
5.2 Presentation Tips
- Serve in individual ramekins or scoops for a refined look.
- Garnish with additional cinnamon, a sprig of mint, or a dusting of powdered sugar.
Chapter 6: Variations and Creative Twists
6.1 Incorporating Other Fruits
- Pears, cranberries, or raisins can add flavor complexity.
- For a berry twist, layer blueberries or blackberries with apples.
6.2 Gluten-Free Version
- Use gluten-free oats, almond flour, and gluten-free baking blend.
- Ensure all ingredients are certified gluten-free.
6.3 Vegan Apple Crisp
- Replace butter with coconut oil or vegan margarine.
- Use maple syrup or agave instead of honey or brown sugar.
6.4 Spiced Variations
- Add a pinch of cardamom, allspice, or clove to the filling or topping.
- Incorporate fresh ginger for a zing.
6.5 Crust Variations
- Add chopped nuts or shredded coconut to the topping.
- Use a streusel with oats, nuts, and a touch of cinnamon.
Chapter 7: Troubleshooting and Tips
7.1 Common Issues
- Topping is too soft or soggy: Ensure butter is cold; bake at proper temperature; consider pre-baking the topping slightly.
- Apples are too watery: Use firmer apples or add extra flour/cornstarch.
- Topping burns: Cover loosely with foil if browning too quickly.
- Filling not bubbling: Bake longer or ensure apples are sliced evenly and pre-cooked slightly if needed.
7.2 Time-saving Tips
- Use pre-sliced apples.
- Prepare the topping ahead of time and store in the fridge.
- Make the filling and topping a day in advance; assemble and bake when ready.
7.3 Storage and Reheating
- Store leftovers in an airtight container in the refrigerator for up to 3 days.
- Reheat in the oven at 350°F (175°C) for 10-15 minutes or until warm.
- For freezing, wrap tightly and freeze for up to 2 months.
Chapter 8: Final Thoughts and Inspiration
The classic apple crisp is a versatile, comforting dessert loved worldwide. Its simple ingredients and straightforward technique make it accessible for bakers of all skill levels. With the tips and variations provided, you can customize it to your taste and occasion.
Remember, the key to a perfect apple crisp lies in selecting quality apples, balancing flavors with spices, and baking until golden and bubbly. Whether served with a scoop of vanilla ice cream, a dollop of whipped cream, or simply on its own, this dessert promises warmth and satisfaction with every bite.
Conclusion
Mastering the art of making a classic apple crisp is a rewarding experience. From choosing the right apples to creating the perfect topping and baking it to golden perfection, each step contributes to a delicious, nostalgic treat. Don’t hesitate to experiment with flavors, textures, and presentation to make this dessert uniquely yours.
Enjoy baking and sharing your homemade apple crisp with family and friends. It’s a timeless classic that never fails to bring comfort and joy.